

Webflow client billing lets you receive payments for the building/hosting of a website other than your own. You can use Webflow’s client billing system to receive direct payments for freelance Webflow work.
What is Webflow client billing and how does it work?
Webflow client billing is a system that lets you build and host a client’s website inside of your own Webflow workspace while letting this client pay for their own site subscriptions/add-ons using their own payment method.
Here is one example: you are running a client’s B2B SaaS website. You built the website and you host it in your workspace. But, this client pays for the website subscription and the add-ons this website relies on.
Right within the Webflow dashboard, you can track invoices, send payment reminders, and obtain an overview of the financial data underlying your arrangement with a particular client.
Before we conclude this section, there is one more thing to know: Webflow client billing is called “Client Payments” within the Webflow Freelancer and Webflow Agency plans.
How freelancers set up Webflow client billing
Freelancers can set up Webflow client billing using the four steps clarified below.
Step 01: Set up your Webflow Workspace
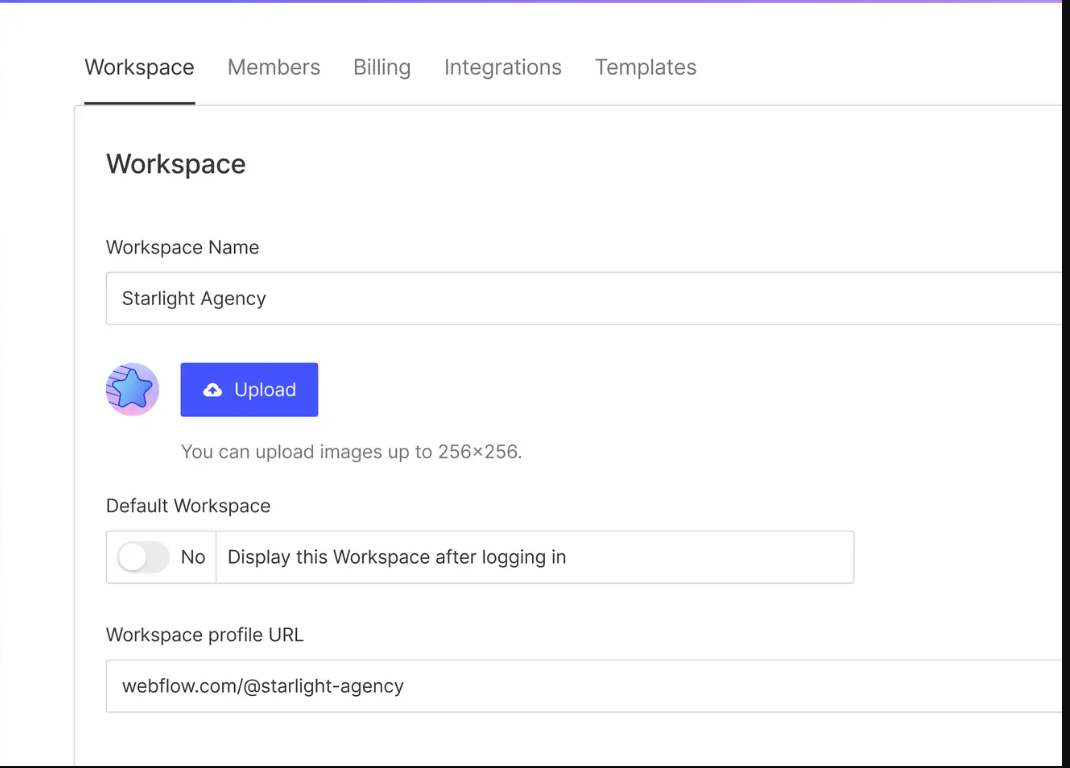
To set up Webflow client billing, you must set up your Webflow Workspace:
- Log into Webflow and set up a Webflow Workspace using the “Webflow Workspace” menus. This menu is distinct from the “Webflow hosting” menus.
- Choose a Webflow Workspace Plan that supports client billing; this usually means a Webflow Freelancer or Webflow Agency plan. Workspace plans are different from hosting plans.
- Move the client’s website into that Workspace plan. Or, if a website does not exist yet, build that website within the Workspace plan.
Step 02: Connect your Webflow Workspace to payment processing
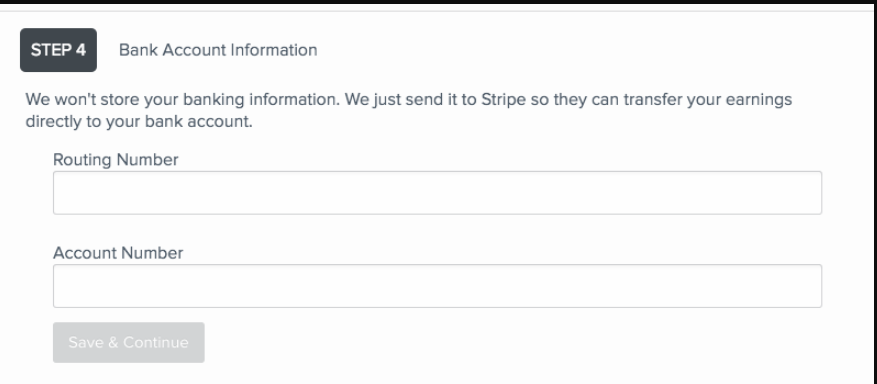
Right after you complete the first step, you will need to connect your Webflow account to payment processing:
- Go to “Site settings” and link a verified Stripe account to your chosen Webflow Workspace.
- Input the required tax and banking information; make sure it is accurate, too.
- Select the local currency you intend to bill your client with.
You need to use a Stripe account for Webflow client billing. This requires setting up a Stripe account, verifying it, and being able to receive payments through it.
Step 03: Assign the Webflow website
You must link a specific Webflow website to the Stripe payment information set up in the prior step:
- Go to the dashboard of a specific Webflow website that you developed for a client.
- Open the “Site settings” menu.
- Click the “Billing” tab within the “Site settings” menu. Or, “Plans” tab, depending on your configuration.
- Select the “Charge to client” button.
- Input the client’s email address and specify the billing terms, allowing Webflow to bill the client.
Here is one alternative to the fifth step: set that client as a “collaborator,” so they can receive invoices directly.
Step 04: Set the price and invoice frequency
The fourth, and final, step is to set the price and invoice frequency of your Webflow services:
- Select a Webflow hosting plan that is appropriate for the website. This could be the “Basic,” or “Premium” plan, among several others. Webflow hosting plans are different from Webflow Workspace plans.
- If you would like to do so, add a pricing markup to the base Webflow hosting costs. This markup can cover the costs associated with maintaining and managing the website, among other things.
- Choose the billing frequency: monthly billing or annual billing. If you use monthly billing, your client will be billed once a month. If you use annual billing, your client will be billed once a year.
- Go over the final price total and, if it works for you, send the payment link to the client. They can use this link to activate their subscription. You could also send them an invoice, instead of a payment link.
Pricing and markups with Webflow client billing
Many freelancers choose to markup the costs of Webflow hosting when billing their clients. Building a website takes a lot of time and energy; so does managing a website and maintaining it.
The base wholesale price of Webflow’s hosting plans
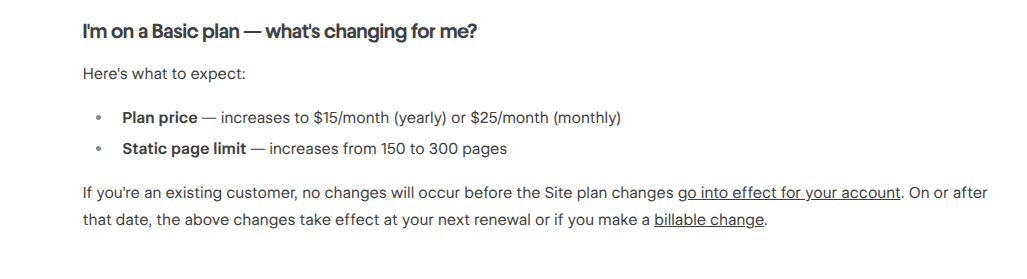
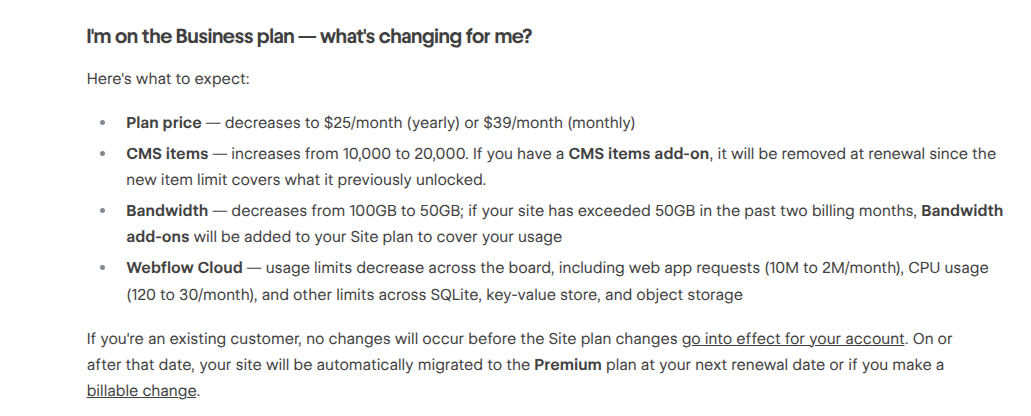
The base wholesale price of Webflow’s hosting plans, as per a May of 2026 update from Webflow, can be found in the space below:
- Webflow’s Basic Plan: $15 A Month When Billed Annually/$25 A Month When Billed Monthly
- Webflow’s Premium Plan: $25 A Month When Billed Annually/$39 A Month When Billed Monthly
- Webflow’s Team Plan: $2,500 A Month When Billed Annually - This Plan Requires An Annual Contract
Outside of the above, you can add native Webflow tools to a Webflow website. These can increase the monthly costs associated with a particular Webflow website.
Deciding your profit margins
To decide your profit margins, on top of Webflow’s overall costs, you should keep the following in mind:
- A markup of 100% to 200% is often considered the bare-minimum, due to the costs associated with building, maintaining, and managing a Webflow website.
- If you sell a $25 a month Webflow Premium plan for, say, $80 a month, it is easier to cover the baseline software, invoicing platform fees, and any administrative costs you may have to deal with.
- You are not selling cloud storage or a Webflow hosting plan: you are selling a well-managed online asset. And, as such, you should charge for the management of this online asset.
Support, small tweaks, and administrative time
Support, small tweaks, and administrative time should be included in your markup:
- A client may lock themselves out of the Webflow editor or need help using one of Webflow’s many features. You may need to help them. This is technical support and it should be part of your markup.
- Clients may request “small tweaks.” Layout changes and test switches, to name two examples. You may want to meter these small tweaks, so that you aren’t overextending yourself without proper compensation.
- You may need to deal with domain configuration renewals, Webflow billing failures, and SSL troubleshooting. All of these things cost money, time, and energy. These should be a part of your markup.
Selling hosting for recurring revenue
The most lucrative Webflow pricing system, for freelancers, tends to be a “Monthly Management Package” that lets you sell hosting for recurring revenue. Here is how it usually works:
- You sell Webflow hosting within a specific package that has been tailored to a specific market. This package could be “Webflow Premium Monthly Management Package,” among other possibilities.
- Instead of just selling Webflow hosting, you also sell “monthly support,” a set number of tweaks, and/or “quarter link audits,” among many other features you could sell.
- You sell different tiers of “Monthly Management Packages.” Some package tiers could cost less money and come with less support, while others would cost more money and come with more support.
Here is one example: you sell a “Webflow Premium Monthly Management Package” for $150 a month. This package comes with the Webflow Premium hosting plan, 30 minutes of administrative tweaks every month, active SSL monitoring, and a quarterly link audit.
Selling hosting for recurring revenue comes with a few major benefits:
- It creates a predictable monthly recurring revenue that can enrich you, and your business.
- You don’t have to start each month at “zero.”
- If the sites are performing well, clients are unlikely to close out their contract.
To sell hosting for recurring revenue, you need to set expectations:
- You are not selling Webflow hosting but, instead, the management/maintenance of an asset.
- Clarify the features associated with each hosting package and show clients how these will benefit them.
- Make it very clear what your clients are paying for, in terms of support, maintenance, and more.
If a payment fails to go through, and you do not receive the money you are owed, you should:
- Establish an enforcement timeline that includes an automated email notification, sending a direct personal message, and adding a late fee to the initial invoice after a certain amount of time has passed.
- Give clients a grace period before you tack on a late fee. This grace period could be anywhere from five days to fourteen days.
- Unpublish a Webflow domain if a client goes completely radio silent. Doing this will not delete the website from Webflow, but it will remove it from your hosting plan.
The hand-off process
Pre-handoff checklist
Before giving a Webflow website to your client, there is a hand-off process you should go through. This hand-off process starts with a pre-handoff checklist:
- Test all responsive breakpoints for text shifting or broken scaling.
- Verify cross-browser functionality across modern web browser layouts.
- Run a full clean up on the “Style Manager” and purge any unused CSS classes.
- Ensure images have been converted to the WebP format.
- Make sure heavy videos are optimized or hosted externally.
- Verify that all form entry configurations route to the client’s destination email and connect to their CRM.
- Turn on “Global Canonical Tags” in Webflow’s “SEO settings” panel.
- Set up “Custom 404” redirect pages.
- Make a video that shows your client how to use the Webflow Editor to alter basic elements of their website.
- Document any custom code and/or unique setups for the client using a simple Markdown document.
Retaining a Webflow website or transferring it to the client
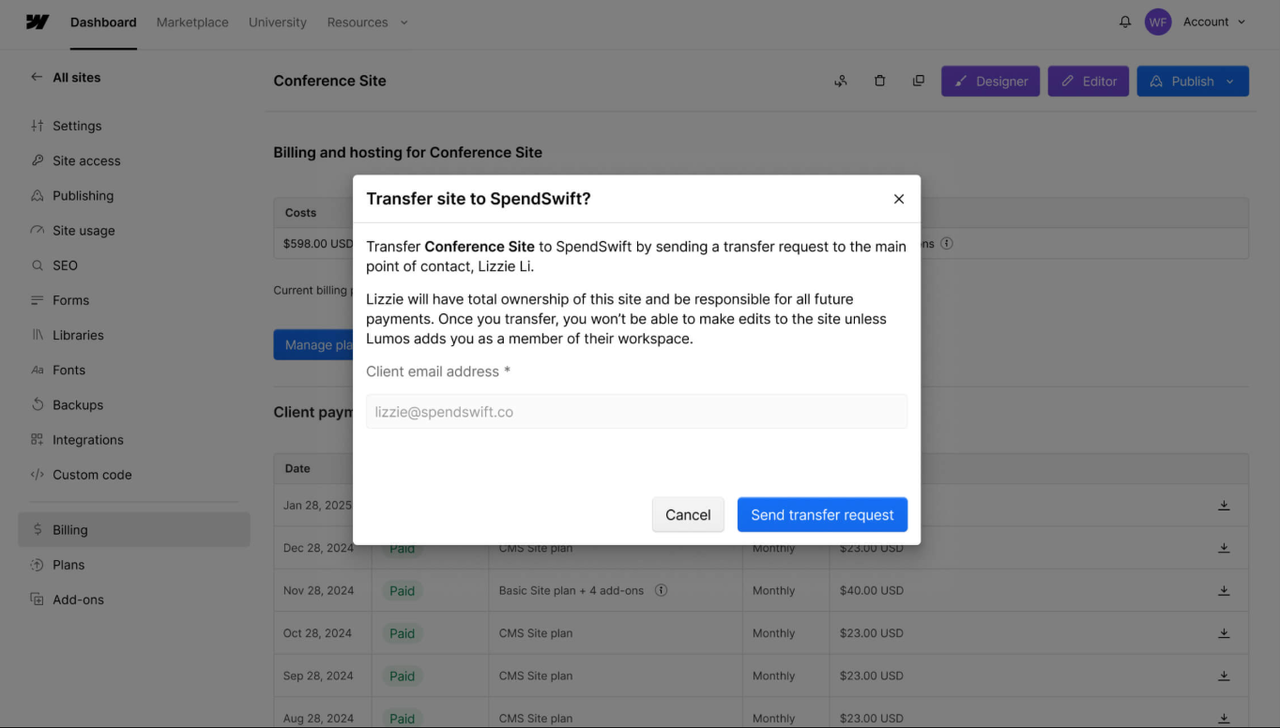
You can choose to retain a Webflow website within your Workspace or to transfer this website to the client:
- If you retain a Webflow website within your Workspace, the client will have editing privileges. But, they won’t be able to alter structural classes or break the core design layout. This can reduce security vulnerabilities and keep the site within your control.
- If you transfer a Webflow website to the client, using Webflow’s native “Transfer Project” feature, they will have complete administration privileges. This can create security vulnerabilities and make it more difficult for you to manage the website.
If you are working with a smaller website or business, a local company, or a mid-market B2B SaaS brand, retaining the Webflow website within your Workspace may be the best choice.
On the other hand, if you are working with an organization that relies on strict IT and security protocols, transferring your website to their Workspace may be the best choice.
Offboarding a Webflow website
To offboard a Webflow website, you need to deliver a secure digital document that includes:
- A direct link to their Webflow website’s Webflow Editor.
- Ownership transfer access to custom tools that were built for the website.
- Every single one of the newly created API keys for the website.
Before you finish offboarding, you may want to pitch a retainer for one of the packages you offer:
- Go over the website you are giving to the client and highlight its features, security, and overall value as a business asset.
- Highlight the fact that websites need maintenance and management; without these things, a website may not be able to obtain conversions or drive revenue growth.
- Pitch a retainer package with tangible, outcome-driven features that focus on maintaining and managing the website you are offboarding.
Webflow client billing can save time and expand your profits
Webflow client billing can save time and expand your profits. But, that’s not all: you can use Webflow client billing to build stable, recurring, and dependable revenue streams by turning your services into monthly packages.
If you would like to set up a Webflow website that assists your clients, you can click this link to see our Webflow app database.

